
Also mentioned at Craftster.org...

Approximate time for 2 earrings: up to 1 hour
Materials:
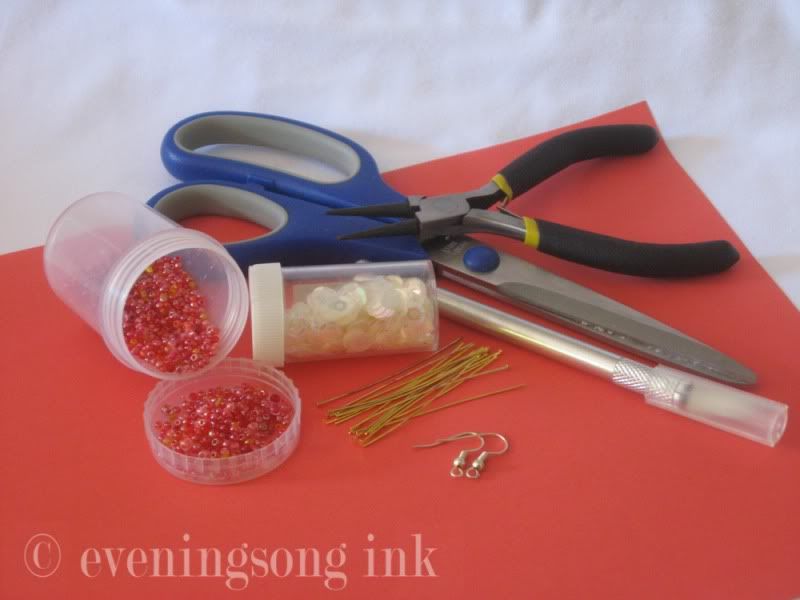
- 1 piece of office paper in your chosen colour, or 1 piece of decorative scrapbook paper cut to size (I used a plain piece of red copy paper. Dress up plain paper with a stamp or draw some squiggles)
- 2 x 5cm (1 inch) head pins, any metal
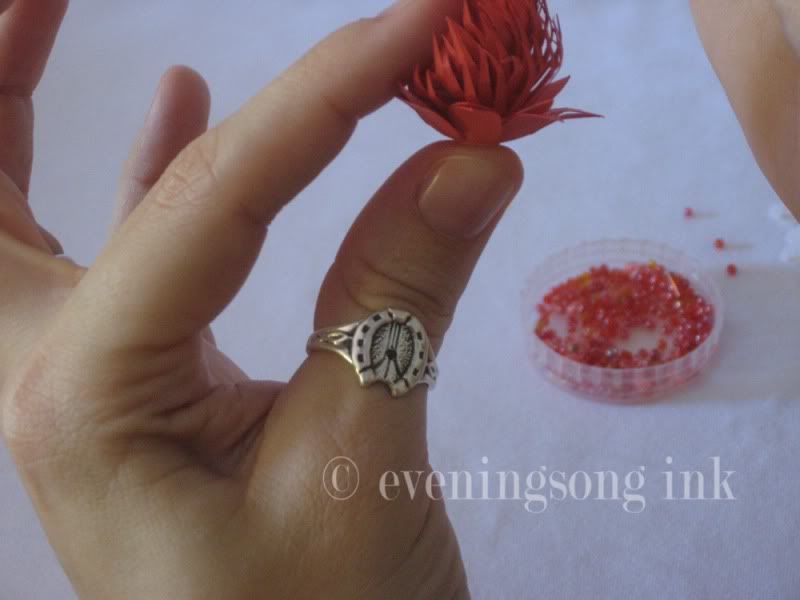
- A pinch of seed beads to complement your paper colour ( I chose red)
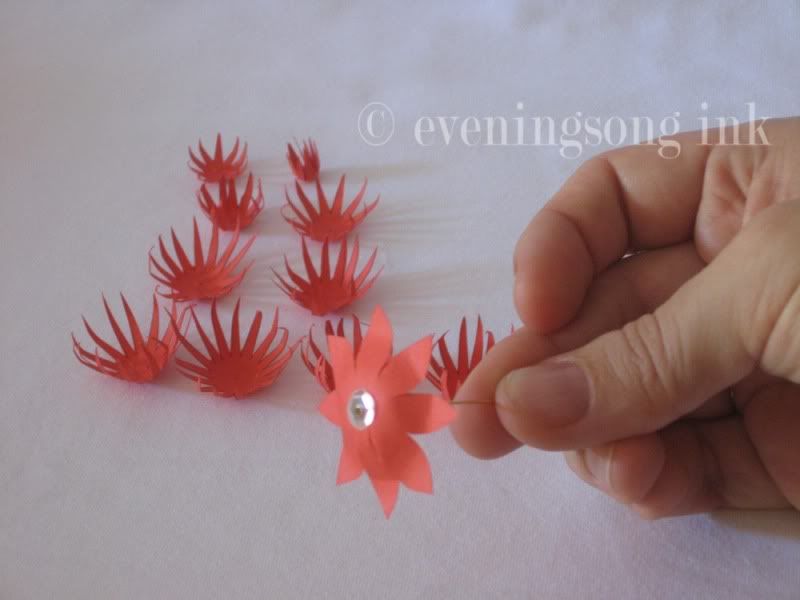
- 2 x sequins, any colour you like (mine are pearl white)
- earring findings of your choice - these earrings can also be attached to plain sleepers instead of earring hooks or studs
Tools:
- craft knife, or scissors if you prefer
- round nosed pliers to close the loops
- desktop printer
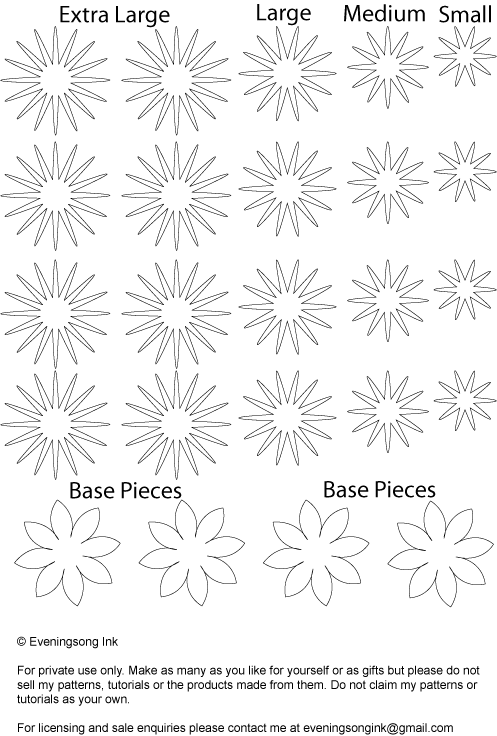
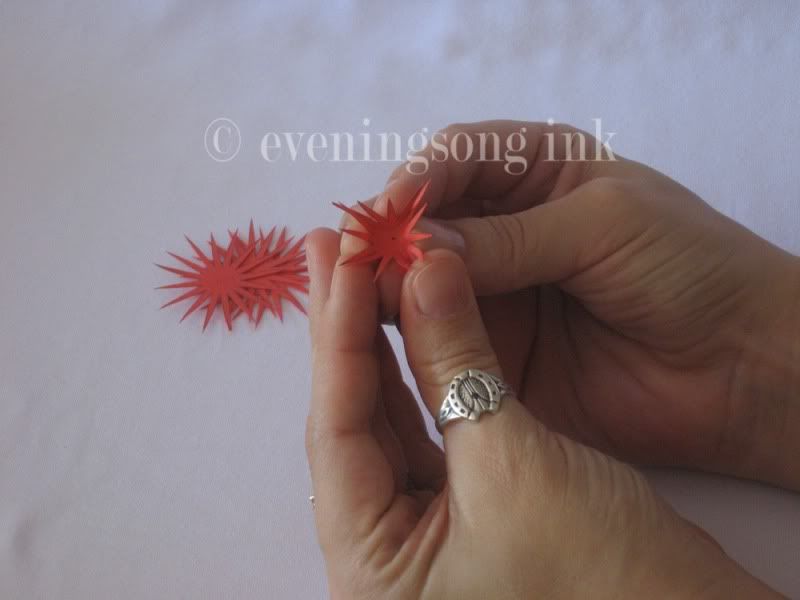
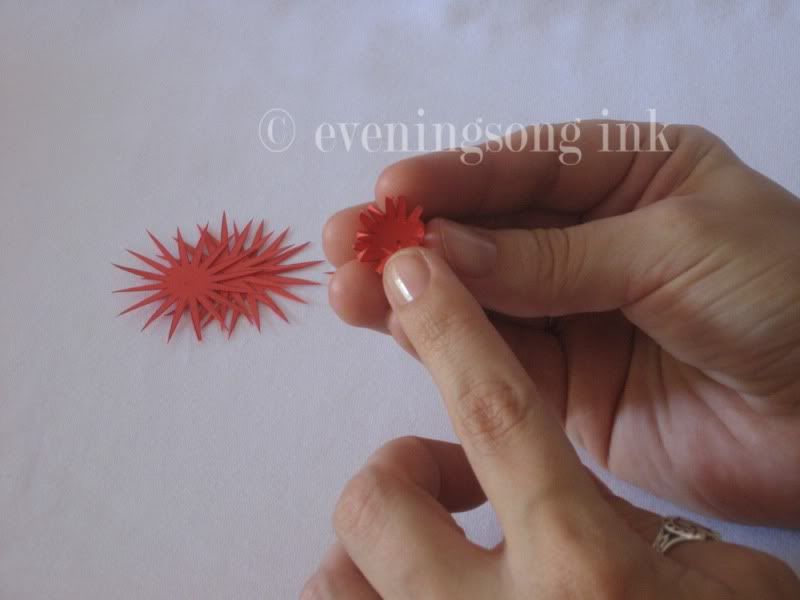
2. Pierce a small hole in the centre of each piece using a craft knife or thumbtack.
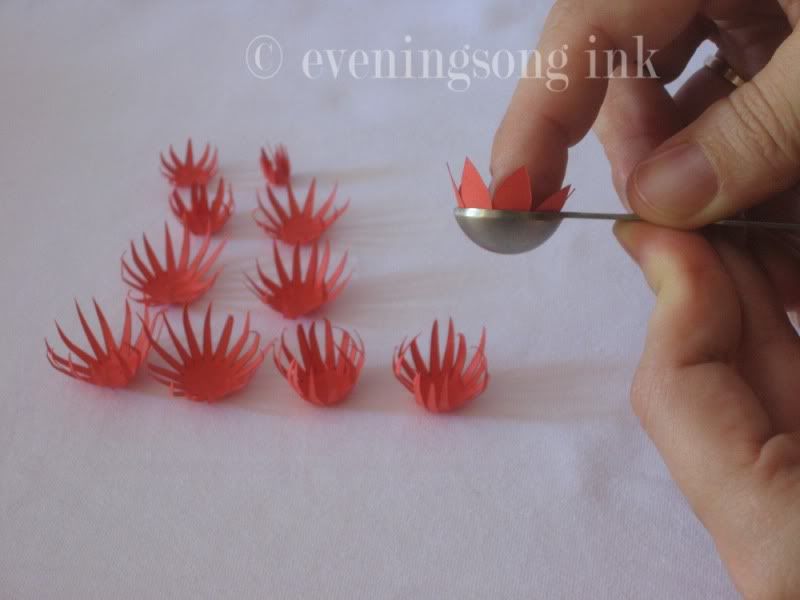
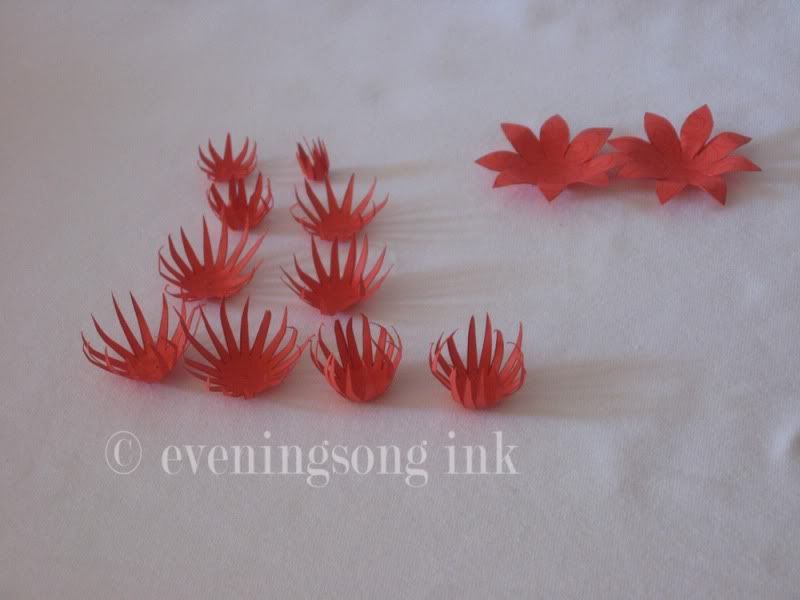
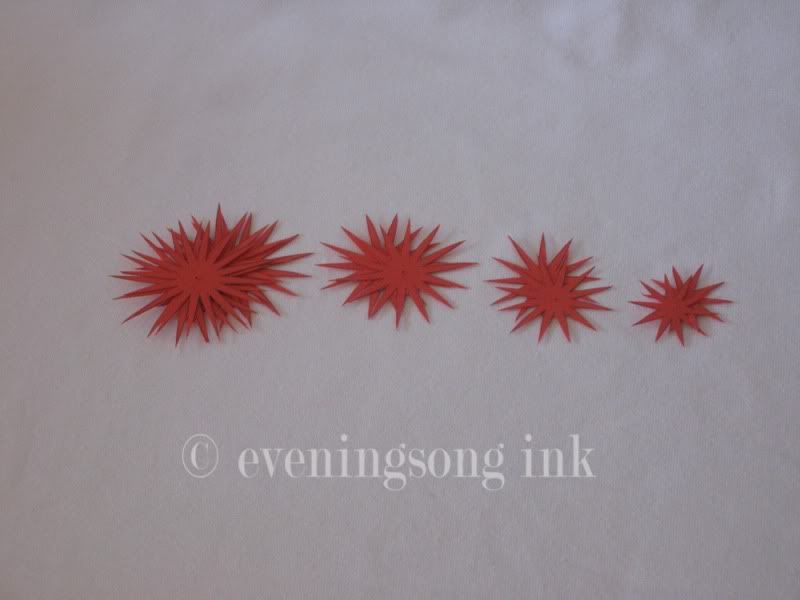
5. Mould the base pieces into shallow bowls and curl the petals back. I used a half-sphere measuring spoon for this but your fingers will do fine.
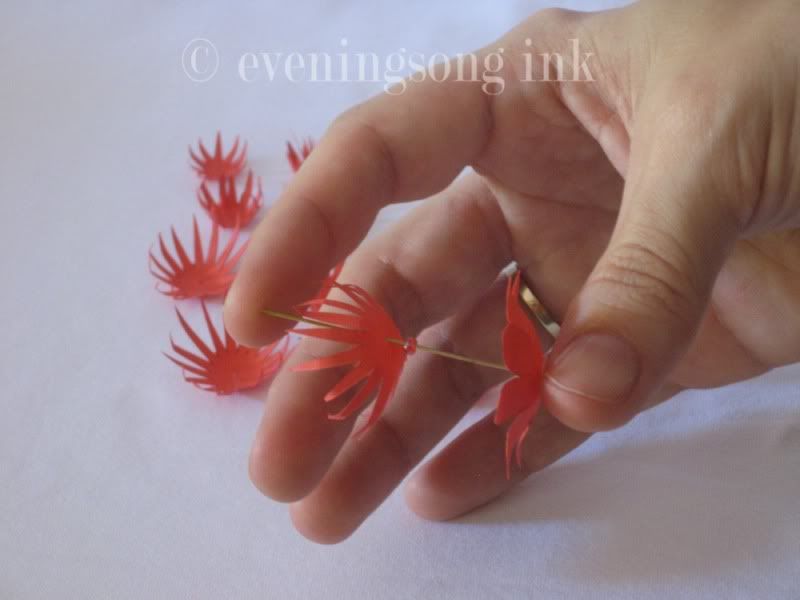
7. Add the next base piece followed by a seed bead.
8. Thread on one of the extra large petals, followed by a seed bead.
9. Repeat this process, progressing down through the petal sizes.
10. Thread the final small petal and follow with a seed bead.


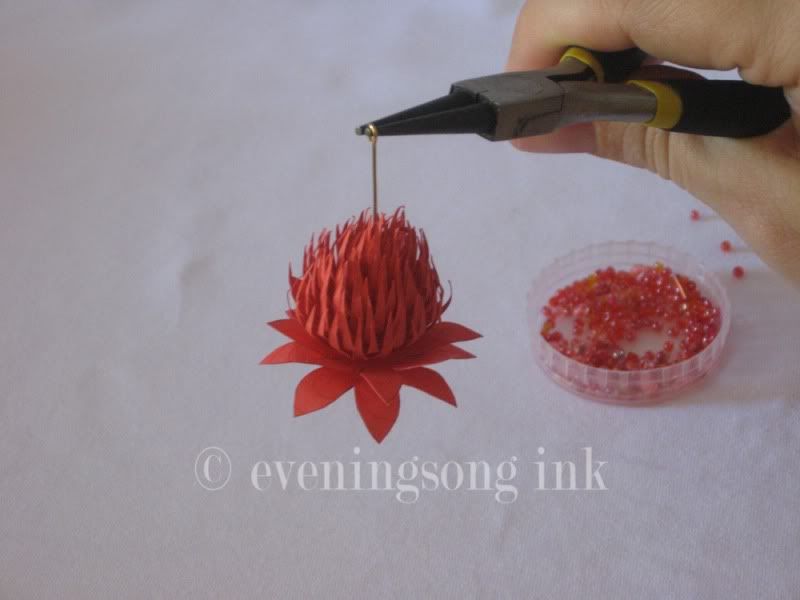


NOTE: You can also make a plain, upright flower. Thread the pieces from smallest to largest, followed by the base pieces. Secure with a crimp bead and give to a loved one.
If you make your own please let me know how they turn out!
Also, I do apologise for the copyrights on the pictures and the disclaimer on the pattern. I really do not mean to be rude or distrustful, but being the internet you never know when someone will swipe your tutorial and claim it as their own. This is purely to discourage unsavoury characters and to hopefully prevent others from profiting from my hard work without my permission.
Those look sooo cool!
ReplyDeleteAren't you afraid they'll get damaged from rain?
Thanks Reichan.
ReplyDeleteGiven our temperatures are a dry and toasty 30+ degrees at the moment the last thing i am worried about is rain! Boy would I like some though.
These originally started out as a temporary project but I have given some thought to longevity and I think a few coats of spray sealer would give them a nice shelf life.
I love these! They are going on my "to do" list! Nic
ReplyDeleteThanks Nic :D
ReplyDeleteI would love to see your take on them!
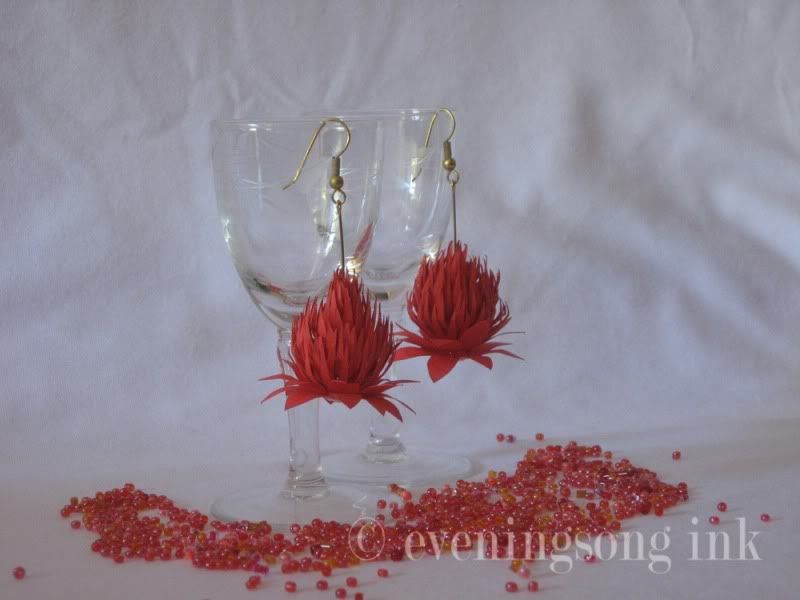
I love how easy these Waratah flowers are to create.
ReplyDelete