In the last few days coming up to the party I whipped up a few DIY projects to bring the whole thing together.
Top: Happy Birthday banner.
Recycled cardboard, markers, imagination
Middle left: Cake bunting.
Bamboo skewers, craft wire wrapped with yarn, scrapbooking paper, glue, paint, marker
Middle right: Photo booth sign.
Recycled cardboard, markers
Bottom left: Cake and cupcake platter.
Two pieces of scrap wood (covered temporarily with a piece of vinyl table cover and taped in place), a hollow Megabloks construction, double-sided tape (to give a little more security between the Megabloks construction and the top tier)
Bottom right (top): Finalised photo booth props.
Each image is printed onto regular copy pare and then glued onto a manila folder. When dry the maskes are cut out and an extra large paddle pop stick is glued to the back
Bottom right (bottom): Table decorations.
I raided my son's plastic dinosaurs and transformers and used them to decorate the cake table, food table an present table.
Everything here cost me a few dollars for the paddle pop sticks, colour printing - since my home printer shit itself :( - scrapbook paper and table vinyl. I have left-overs of the sticks, paper and vinyl and still have the photo props as they are really quite sturdy!
Showing posts with label Tutorials. Show all posts
Tuesday, May 15, 2012
Sunday, May 13, 2012
DIY target game tutorial
As seen in the super-duper 5th birthday party of 2012, the target game!
The shooter tutorial can be found at Come Together Kids. That is where I originally saw the idea and I won't rip of the concept by making my own tute :)
At most this project will cost you a couple of dollars. At best, it will be free! I always keep a few plastic cups and balloons in the cupboard for when I have a party.
I picked up the clear standard plastic cups and found them strong enough to support the balloons on their own. No need for doubling up the cups.
The shooter tutorial can be found at Come Together Kids. That is where I originally saw the idea and I won't rip of the concept by making my own tute :)
At most this project will cost you a couple of dollars. At best, it will be free! I always keep a few plastic cups and balloons in the cupboard for when I have a party.
I picked up the clear standard plastic cups and found them strong enough to support the balloons on their own. No need for doubling up the cups.
DIY Birthday party stage 2 - activities & games
ooooookkkkkkk
Birthday Party stage 2 involves the games. All these games are recyclable, diy, customisable and nearly free (or totally free, depending on your stash).
Top: colour in.
Easy friggin peasy guys! I found some free colour in pictures of Transformers and dinosaurs, changed the black to a medium gray (so they are nicer to colour) and printed them.
Middle: Pin the tail on the dinosaur.
Cardboard from a box, with butcher paper glued over the front, painted by hand. Add a matching cardboard tail and ta- da! Inspired by: Paper and Cake
Bottom left: Target game. (Tutorial)
Disclaimer! IF you include this in your party be prepared for it to be hijacked by the adults. Oh, and leave it till last as the kids love it too!
Cardboard from a box, softdrink box, tissue box, cracker box, white glue, tape, paint, pom poms, plastic cups, balloons. Pom pom shooter tutorial over at Come Together Kids
Bottom right: Ring toss.
Cardboard, cardboard tube from a aluminum foil pack, cheap paper plates, glue, staples, paint. NOTE: I found the single plates did not work very well, so I stapled two plates together, one upside down on the other. Inspired by A Little Learning For Two
Along with the DIY photo booth there was barely enough time for the kids to play with everything. They had a ball and a bunch of the adults got involved too. Laughter and merriment was the order of the day!
Birthday Party stage 2 involves the games. All these games are recyclable, diy, customisable and nearly free (or totally free, depending on your stash).
Top: colour in.
Easy friggin peasy guys! I found some free colour in pictures of Transformers and dinosaurs, changed the black to a medium gray (so they are nicer to colour) and printed them.
Middle: Pin the tail on the dinosaur.
Cardboard from a box, with butcher paper glued over the front, painted by hand. Add a matching cardboard tail and ta- da! Inspired by: Paper and Cake
Bottom left: Target game. (Tutorial)
Disclaimer! IF you include this in your party be prepared for it to be hijacked by the adults. Oh, and leave it till last as the kids love it too!
Cardboard from a box, softdrink box, tissue box, cracker box, white glue, tape, paint, pom poms, plastic cups, balloons. Pom pom shooter tutorial over at Come Together Kids
Bottom right: Ring toss.
Cardboard, cardboard tube from a aluminum foil pack, cheap paper plates, glue, staples, paint. NOTE: I found the single plates did not work very well, so I stapled two plates together, one upside down on the other. Inspired by A Little Learning For Two
Along with the DIY photo booth there was barely enough time for the kids to play with everything. They had a ball and a bunch of the adults got involved too. Laughter and merriment was the order of the day!
Wednesday, January 4, 2012
Crafty gift roundup Part 2
Here are the rest of the crafty Christmas ideas!
Spinosaurus
shirt for Poppy. Using Xavier's own artwork I created a freezer paper
stencil and decorated the pocket with fabric paint.
T-shirts for Xavier's uncle and Daddy, made using the freezer paper stencils also
Gift hamper for donation, more about the project here.
Golf shirt and golf towel for Grandad. Once again using Xavier's art and freezer paper stencils.
Customised dino dig game, tutorial coming.
Tulle pom poms, for tree decoration or home decoration, tutorial coming.
Plush stegosaurus pillow cover, tutorial coming.
Fabric wrist cuffs - perfect for covering wrist tattoos, tutorial coming.
Tuesday, January 3, 2012
Happy New Year! Crafty gift roundup Part 1- ideas and instructions
Happy 2012!
I'm starting off the new year by wrapping up the old one :) I wanted to share our crafty Christmas gifts with you and hopefully lend a little inspiration for the coming holidays/birthday/any time at all.
Anklets:
Here is a good tutorial for the knotting technique. My anklet is 6 strands, 2 white, 2 forest green, 1 sage green, 1 grass green. Alexis has 2 dark purple, 2 medium purple and 2 blue. These can be as big or small as you want and you can use any amount of colours.
Hairclips:
Here's a good visual tutorial for how to cover your alligator clips with ribbon. Remember you are ONLY covering the top part of the clip and the hinge part. The bottom must be left bare so it slides into the hair. NOTE: I used a lighter to singe my ribbon ends and a hot clue gun to attach the ribbon. It was really easy. I got my clips from here, great product and great prices.
And a note on the new year stuff, I'm really not one for New Year's resolutions. You don't need a new year to start something or change something, every day, hour and minute gives you the chance to embark on a new path. You are never a failure for not keeping resolutions, just keep on in the right direction and give yourself a pat on the back for trying again.
I'm starting off the new year by wrapping up the old one :) I wanted to share our crafty Christmas gifts with you and hopefully lend a little inspiration for the coming holidays/birthday/any time at all.
My husband made anklets for my daughter and myself. I just love that he made these with his own hands and picked the colours for us!
Hairclips for my daughter and niece. These were so simple and look beautiful.
Headbands for the babies too. I got to use my new ruffler foot for these :D
Action shot!
Christmas day outfits for both kids. Tutorial for shirred baby dresses over here.
Here is a good tutorial for the knotting technique. My anklet is 6 strands, 2 white, 2 forest green, 1 sage green, 1 grass green. Alexis has 2 dark purple, 2 medium purple and 2 blue. These can be as big or small as you want and you can use any amount of colours.
Hairclips:
Here's a good visual tutorial for how to cover your alligator clips with ribbon. Remember you are ONLY covering the top part of the clip and the hinge part. The bottom must be left bare so it slides into the hair. NOTE: I used a lighter to singe my ribbon ends and a hot clue gun to attach the ribbon. It was really easy. I got my clips from here, great product and great prices.
And a note on the new year stuff, I'm really not one for New Year's resolutions. You don't need a new year to start something or change something, every day, hour and minute gives you the chance to embark on a new path. You are never a failure for not keeping resolutions, just keep on in the right direction and give yourself a pat on the back for trying again.
Friday, December 30, 2011
Tutorial - shirred baby dresses
I managed to have nearly two weeks off, yay! Ok, nearly off, I did sneak in a little work here and there ;P
I'm breaking my silence by giving you a tutorial for shirred baby dresses. I made a bunch of these for my daughter and my niece and they turned out so adorable I just had to share
Please see the tutorial over at Hand Made-n's blog, you can view it on screen or save the file for later use!
Creative Commons Attribution-NonCommercial-NoDerivs 3.0 Unported License
I'm breaking my silence by giving you a tutorial for shirred baby dresses. I made a bunch of these for my daughter and my niece and they turned out so adorable I just had to share
Please see the tutorial over at Hand Made-n's blog, you can view it on screen or save the file for later use!
Creative Commons Attribution-NonCommercial-NoDerivs 3.0 Unported License
Friday, December 2, 2011
Recycled plant pots - the perfect gift or decoration :) Tutorial!
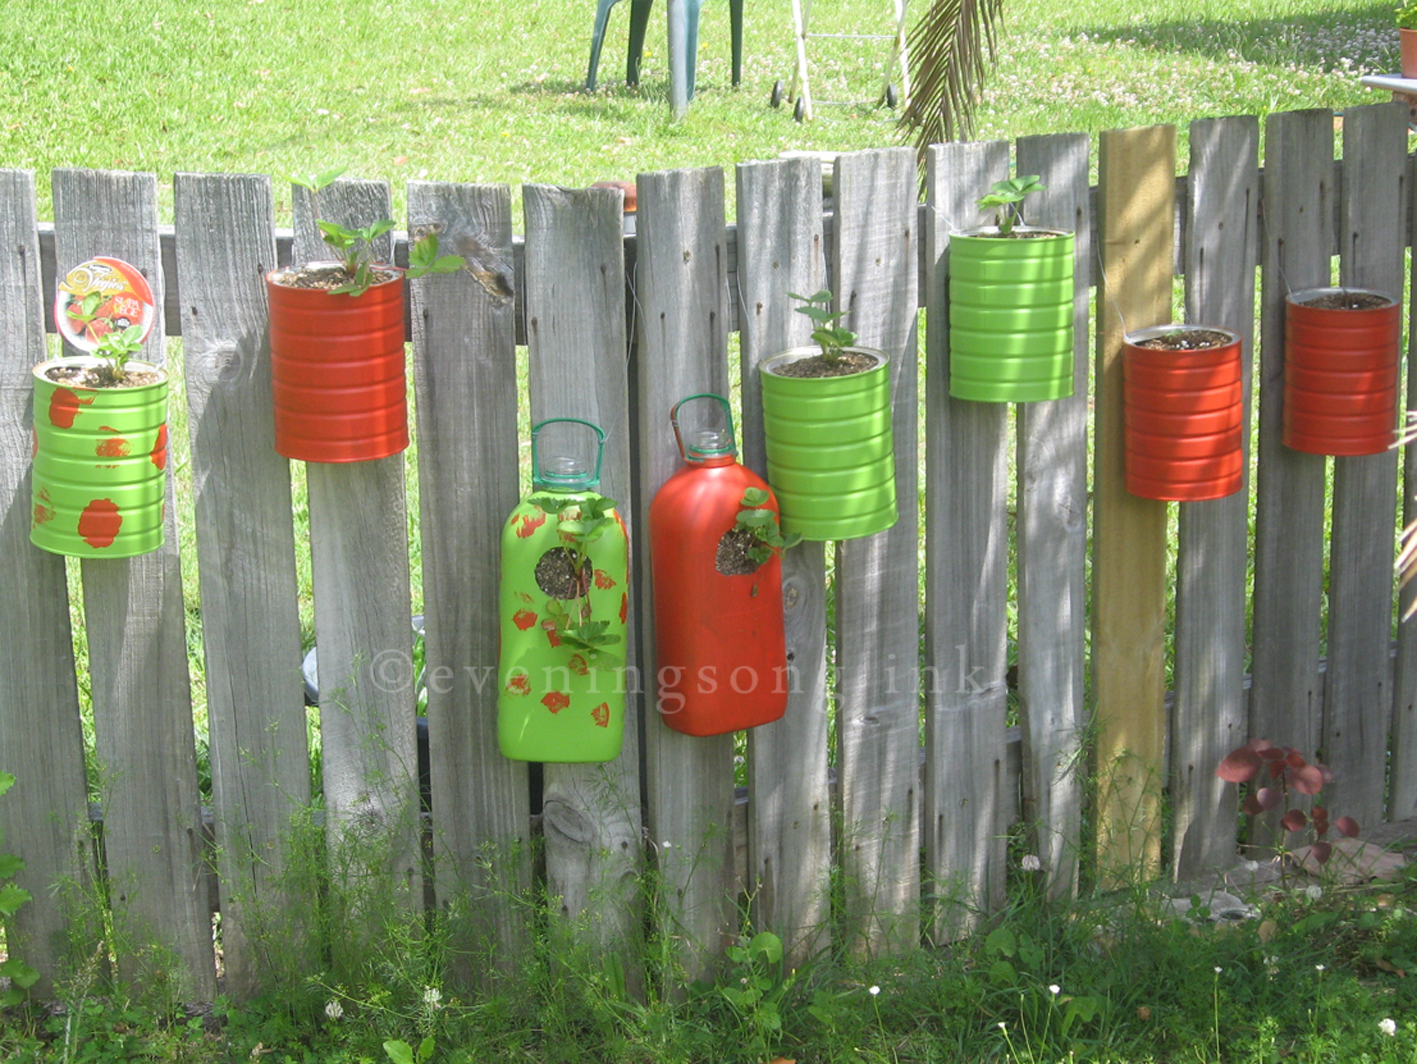
Yet another recycled gift to add to your Christmas crafting is the Recycled Plant Pot. Seriously, if you grow these suckers from seed you'll spend about $2.00 for as many gifts as you like. Of course, don't be surprised if you end up keeping these little beauties for yourself!
Not only are these inexpensive but they are a real gift from the heart. Also, they don't collect dust, need batteries, make noise or need maintenance (apart from a little water now and then ;D)
Materials:
Not only are these inexpensive but they are a real gift from the heart. Also, they don't collect dust, need batteries, make noise or need maintenance (apart from a little water now and then ;D)
Mine are filled with delicious strawberries :) I can move the pots to the best position, they drain well and the fruits will tumble down the side without rotting
Materials:
- Clean, empty tins or plastic drink bottles (mine are baby formula containers and 3L juice bottles)
- Garden wire
- Spray primer
- Paint (I used sample pots of wall paint)
- Paintbrush
- Drill
- Craft knife
- Sandpaper
- Potting mix/garden soil/compost
- Seedlings
- Turn your containers upside down and drill some drainage holes in the bottoms
- Bottle planters - cut out a hole for the plant to go into (towards the top of the bottle), it needs to be just big enough to squish in the root ball of the plant. If needed, sand the holes to remove sharp bits
- Can planters - drill two holes at the top of the can opposite each other to thread a hanging wire through. Sand the holes lightly to keep sharp bits at bay
- Roughly sand your containers to give the paint something to stick to. It's important to note that the shiny paint finish on formula containers will repel the paint if not sanded. It doesn't have to be perfect, just rough up the paint or plastic a bit
- Prime your containers with the spray primer. Allow to dry (it won't take long!)
- Paint your containers and decorate as you wish. You will need a couple of coats for good coverage. Allow to dry well
- Snip and attach a length of garden wire to use as a hanging loop. The length will depend on whether you wish to hang your pots from a fence, tree branch or ceiling hook)
- Bottle planters - lay your bottle down and fill with soil through the cutout. Scoop out just enough soil to fit the root ball of your seedling and carefully but firmly pack the plant in. You can keep the bottle laying down for a couple of weeks until the plant is established but I carefully propped mine up immediately
- Can planters - fill with soil, leaving enough space to put your plant. Carefully pack in the roots of the plant and top up with a little more soil
- Give them a drink and put them in a suitable spot to get established until it's time to give them away!
- Raise your own seedlings from seed and this project may well only cost you a couple of dollars
- To give as gifts, choose a pretty annual flower. That way, at the end of the growing season your recipient can either re-plant or recycle their pot. No waste and no clutter! Perfect for the person who has everything
- If you want a no-hassle gift plant your pots with succulents
- For a kitchen goddess (or god ;P) plant your pots with herbs
- For kids, plant a yummy treat like strawberries. My strawberries adore these pots since they like good drainage and if you add a hanging wire the strawberries will tumble down without rotting!
Bottle planter materials
Can planter materials
Drill drainage holes and cut out plant hole
Drill drainage holes and hanger holes
Prime and allow to dry. Paint in chosen colours
Hang them up and let them get established
Cheering up your own garden or awaiting a new home :)
Tuesday, November 29, 2011
A miniature dinosaur garden - tutorial
Here's the low-down, my son loves dinosaurs.
Seriously.
Five minutes with him and you'll not only learn something new but tie your tongue in knots attempting to repeated the bloody names.
He's such a show-off :)
So what do you do for your dinosaur-obsessed kid? Make him his own dino garden, of course! This would be a wonderful gift for any adventurous young soul and can be customised for jungle animals, dogs, fairies, you name it.
Materials:
Seriously.
Five minutes with him and you'll not only learn something new but tie your tongue in knots attempting to repeated the bloody names.
He's such a show-off :)
So what do you do for your dinosaur-obsessed kid? Make him his own dino garden, of course! This would be a wonderful gift for any adventurous young soul and can be customised for jungle animals, dogs, fairies, you name it.
Materials:
- Large shallow tray with holes in the bottom (you can buy from a garden stockist but mine came from the recycling centre)
- Old newspapers or junk mail
- Potting mix
- A selection of small plants
- Plastic animals (or figurines made from an outdoor-friendly material)
- Rocks, twigs, nuts, sand etc
- Grab your tray and line it with newspaper/junk mail
- Fill the tray 3/4 full with potting mix
- Lay out your plants (still in the pots), figurines and ornaments until it looks just right
- Plant your plants and mould the potting mix to achieve hills and valleys for your other adornments
- We added a rock path, scattered some sand over the top and sprinkled in some flower and lettuce seeds (to feed the dinosaurs of course!)
- Find a good place for your miniature garden, keep in mind the preferences of your plants. The idea is that the kids can play with their garden, but it would be best not to keep moving it about
To make this an ultimate gift how about:
- Package all the materials into a DIY garden
- Include a gift basket with a completed garden. With little garden gloves, a packet of seeds, mini watering can, extra animals and a little vial of fairy dust for fairy gardens
- Make a custom sign for the garden with the recipient's name on it
Saturday, November 12, 2011
And then it all went pear-shaped
I have no idea why pear-shaped is bad, but it is.
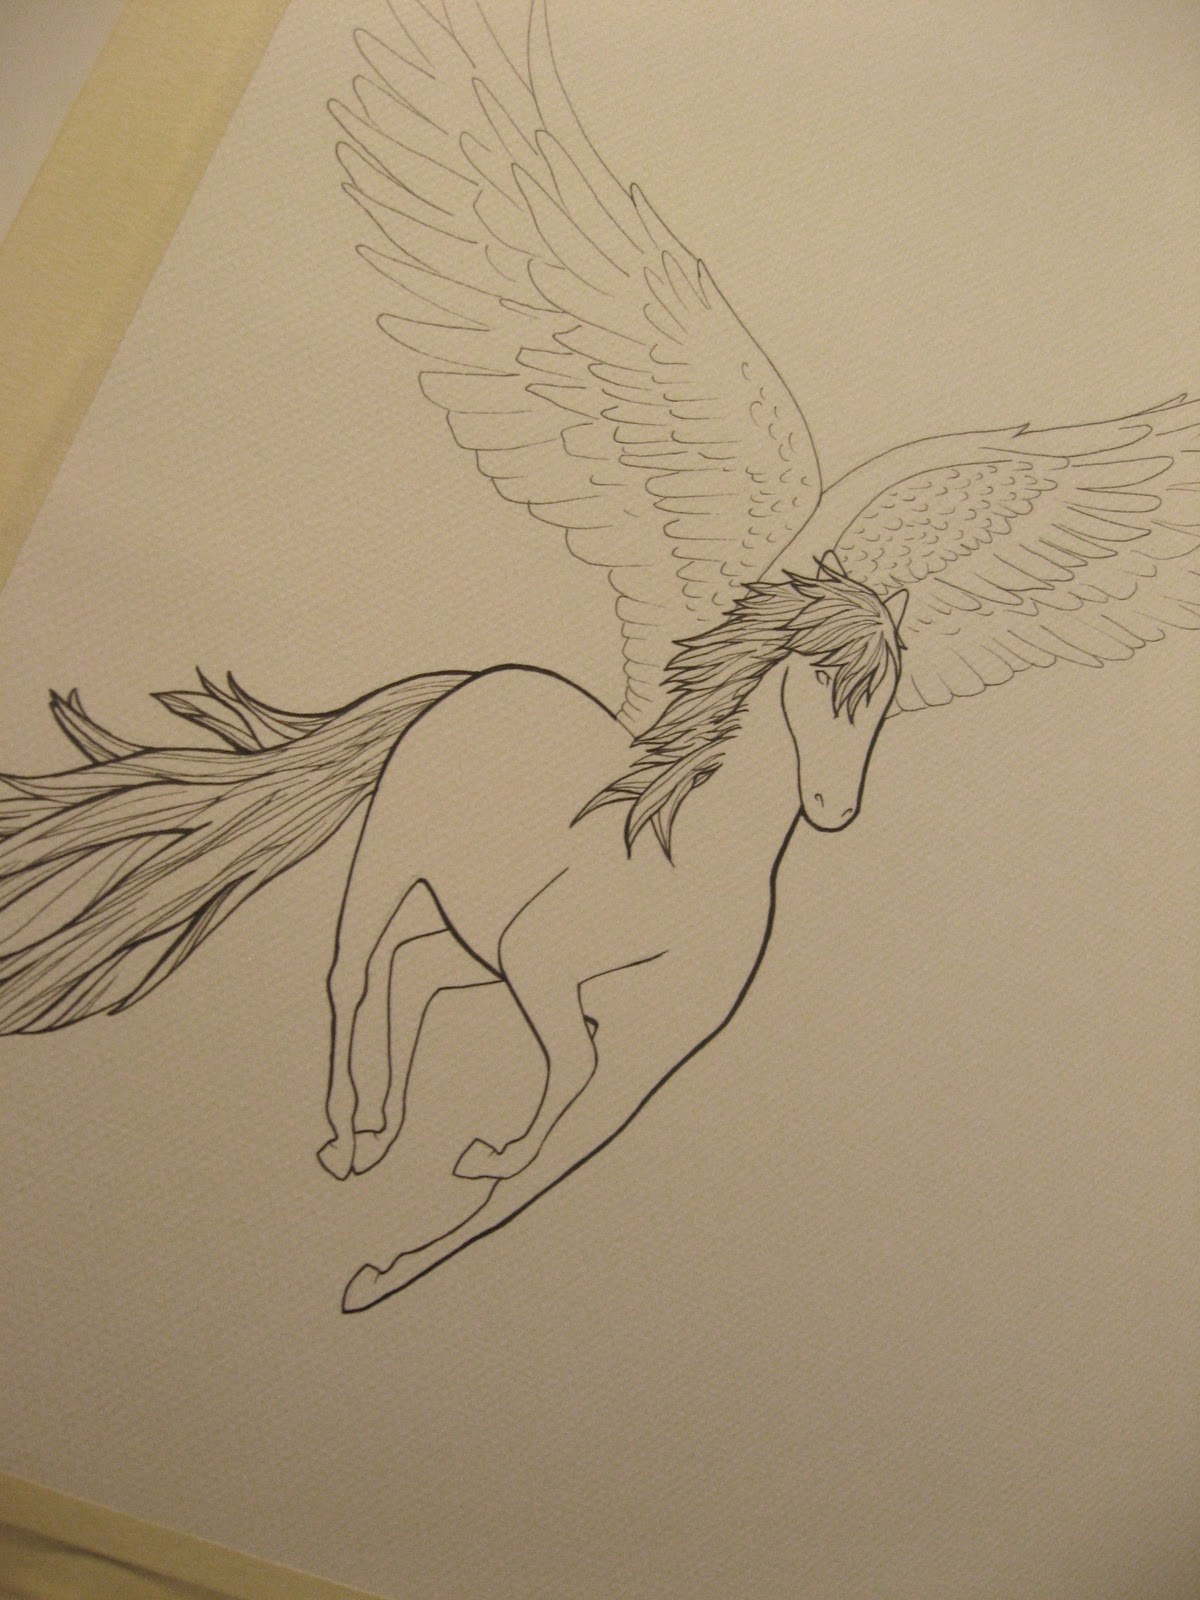
After carefully sketching, masking and taping I added the inks and then shit happened. The paper warped, the ink pigment separated and I ended up with a wet muddy mess.
So I started again.
A decent artists' watercolour paper this time, taped to the board and sketched. AGAIN. By this time I was becoming right royally pissed with winged horses. Do you KNOW how many muscles and shit a horse has? Unless you have studied horse anatomy it makes drawing them a pain in the ass. And here I had to draw it about five times.
Anyway, it's done now. You can see the progress here:
After carefully sketching, masking and taping I added the inks and then shit happened. The paper warped, the ink pigment separated and I ended up with a wet muddy mess.
So I started again.
A decent artists' watercolour paper this time, taped to the board and sketched. AGAIN. By this time I was becoming right royally pissed with winged horses. Do you KNOW how many muscles and shit a horse has? Unless you have studied horse anatomy it makes drawing them a pain in the ass. And here I had to draw it about five times.
Anyway, it's done now. You can see the progress here:
sketch penned in
body outline thickened, hair detail in
first wing detail
second wing detail
contour lines and ink laid on
gouache backdrop in, water and splash detail in
finalised!
So there you go, a little glimpse into the progress of my mixed media drawings :)
Tuesday, November 8, 2011
This is how the inking starts
Just a little insight into how my ink pieces develop.
After sketching the design and finalising my proportions, I sketch the image onto watercolour paper, giving thought to how much background I want to show. Then I grab some masking fluid and a rubber sculpting tool and mask off all the areas I want left the paper colour first.
Once the fluid is dry the background goes on. That's up later :D
After sketching the design and finalising my proportions, I sketch the image onto watercolour paper, giving thought to how much background I want to show. Then I grab some masking fluid and a rubber sculpting tool and mask off all the areas I want left the paper colour first.
Once the fluid is dry the background goes on. That's up later :D
Saturday, October 29, 2011
Fruity jelly cups recipe - the deliciously healthy treat
I have been meaning to write up a recipe for jelly cups for ages, but never seemed to find the time.
These are my go-to saviours when it comes to pre-school parties, 'bring a plate' events and last minute 'Mum, I feel like something yummy' treats. They're simple, easy and most of all HEALTHY! Yay!
Ingredients:
Fruit juice (pictured: apple) - pick a 100% juice for maximum goodness
Gelatin or alternative
Fruit - (pictured: tinned peaches and grapes) a mix of fresh and tinned is delicious
Water
Lollies (pictured: Natural Confection Company snakes) only for treats :)
Equipment:
Large measuring jug
Small measuring jug
Spoon measures
Knife
Cups/bowls/disposable cups
Cookie tray
1. The mathematical bit. Grab your cup and fill it about halfway with water, take note of the measurement. Multiply your measurement by the number of cups you want to fill. This is how much juice you need, pour it into the large measuring jug.
2. Chop your fruit into chunks. I love tinned peaches, fresh grapes, fresh pears and fresh cherries but any fruit is good. Come to think of it I probably wouldn't use bananas, I don't think they would like to be immersed in jelly for too long.
3. Evenly distribute your fruit in your cups.
4. My gelatin pack says 1 tablespoon dissolved in 100mLs of water will set 400mL of liquid. That's about right but I heap my tablespoon measures slightly to ensure a firm set. Use 3 heaped tablespoons of gelatin dissolved in 1 cup of boiling water. Add the gelatin mix to the fruit juice. Stir well, don't let the mix sit too long or it will set.
5. Evenly distribute the juice mix between your cups.
6. Optional: Carefully arrange snakes over the side of the cups, with about half the snake in the fruit mix.
7. Pop the cups on a cookie tray and set in the fridge for a few hours.
You get to control exactly what goes into these sweet treats and the recipe can be altered to suit any palette.
Notes:
Enjoy!
These are my go-to saviours when it comes to pre-school parties, 'bring a plate' events and last minute 'Mum, I feel like something yummy' treats. They're simple, easy and most of all HEALTHY! Yay!
Ingredients:
Fruit juice (pictured: apple) - pick a 100% juice for maximum goodness
Gelatin or alternative
Fruit - (pictured: tinned peaches and grapes) a mix of fresh and tinned is delicious
Water
Lollies (pictured: Natural Confection Company snakes) only for treats :)
Equipment:
Large measuring jug
Small measuring jug
Spoon measures
Knife
Cups/bowls/disposable cups
Cookie tray
1. The mathematical bit. Grab your cup and fill it about halfway with water, take note of the measurement. Multiply your measurement by the number of cups you want to fill. This is how much juice you need, pour it into the large measuring jug.
Juice left, gelatin and water right.
2. Chop your fruit into chunks. I love tinned peaches, fresh grapes, fresh pears and fresh cherries but any fruit is good. Come to think of it I probably wouldn't use bananas, I don't think they would like to be immersed in jelly for too long.
3. Evenly distribute your fruit in your cups.
4. My gelatin pack says 1 tablespoon dissolved in 100mLs of water will set 400mL of liquid. That's about right but I heap my tablespoon measures slightly to ensure a firm set. Use 3 heaped tablespoons of gelatin dissolved in 1 cup of boiling water. Add the gelatin mix to the fruit juice. Stir well, don't let the mix sit too long or it will set.
5. Evenly distribute the juice mix between your cups.
6. Optional: Carefully arrange snakes over the side of the cups, with about half the snake in the fruit mix.
7. Pop the cups on a cookie tray and set in the fridge for a few hours.
You get to control exactly what goes into these sweet treats and the recipe can be altered to suit any palette.
Notes:
- Use disposable cups and spoons for picnics, bbqs, school parties and bring-a-plate events
- Use transparent cups and orange juice/apple and raspberry juice/green-tinted apple juice for ghoulish Halloween jellies. Add some snakes or crumbled cookie 'grave dirt' and worms
- Jellies set in a few hours
- GREAT for babies and toddlers. Use a mild juice like apple or pear and water down as needed and add soft or stewed fruits. Babies practice chewing on the jelly, without the hazard of choking and you can introduce the flavours and fruits you want.
Enjoy!
Friday, May 28, 2010
Gah! I forgot about the morning tea party at kindy tomorrow!! Recipe incl.
11.30 pm and I realise that X has a morning tea party at kindy tomorrow. He needs a funny hat and a plate of something. Crap...
Given that I am the worst morning person I know (well, apart from the hubby :P) I figure I better get this done tonight.
1 funny hat needed. Yeah right, getting a clothes-minded 3 year old to wear a cool hat you spent hours on is nigh impossible. The alternative? Snag husband's old black beanie and adorn with previously cut out Ben 10 fabric swatches that already have the fusible applique interfacing attached. Woo Hoo! If he doesn't want to wear a Ben 10 hat, I'll eat the damned thing.
1 plate of something yummy needed, no eggs (thanks to allergies in the kindy). Let's go the tried and true egg free cake mix that I used for Xavier's birthday cake. It's quick, easy, needs no weird ingredients and frankly it's bloody yummy :D. Darling husband gets roped into helping so I figure we should make a third of the mix chocolate and dye it black, a third vanilla green and a third vanilla yellow. Beats the hell out of making a dozen sandwiches that are likely to go soggy and I use a minimum of low-gi sugar so the little morsels are not even bad for them.
Here is the recipe:
Makes 1 large slab cake (see Lightning McQueen) or use half the mix to make 36 mini-cupcakes like the picture
I don't do anything fancy with this recipe:
Given that I am the worst morning person I know (well, apart from the hubby :P) I figure I better get this done tonight.
1 funny hat needed. Yeah right, getting a clothes-minded 3 year old to wear a cool hat you spent hours on is nigh impossible. The alternative? Snag husband's old black beanie and adorn with previously cut out Ben 10 fabric swatches that already have the fusible applique interfacing attached. Woo Hoo! If he doesn't want to wear a Ben 10 hat, I'll eat the damned thing.
1 plate of something yummy needed, no eggs (thanks to allergies in the kindy). Let's go the tried and true egg free cake mix that I used for Xavier's birthday cake. It's quick, easy, needs no weird ingredients and frankly it's bloody yummy :D. Darling husband gets roped into helping so I figure we should make a third of the mix chocolate and dye it black, a third vanilla green and a third vanilla yellow. Beats the hell out of making a dozen sandwiches that are likely to go soggy and I use a minimum of low-gi sugar so the little morsels are not even bad for them.
Here is the recipe:
Makes 1 large slab cake (see Lightning McQueen) or use half the mix to make 36 mini-cupcakes like the picture
- 4 cups of plain flour
- 2 cups sugar
- 3 1/4 cups cocoa (reduce if you make multi-coloured cakes or omit for a vanilla or flavoured cake)
- 8 tsp baking powder
- 3 tsp vanilla essence
- 1 cup vegetable oil - I use rice bran oil. It's light, good for you and has no flavour. I have also used olive oil, you do not taste the oil in a chocolate cake but I would avoid it for a lighter flavoured cake.
- 3 cups water
I don't do anything fancy with this recipe:
- Pop all the dry ingredients into a large bowl and mix a little
- Add all the other ingredients and mix well (for multi-coloured cakes separate your mix into batches before adding the cocoa to one batch only)
- Put mix into cupcake liners/trays/cake pan (grease pans of course, unless you use silicone trays)
- Bake at 170-180 Celsius for about 30 minutes for a single slab cake, approximately 15 minutes for the cupcakes. This will vary between ovens so check your cakes periodically, cakes are cooked when the tops spring back after gently touching them.
- Drizzle with a little icing and away you go!
Subscribe to:
Posts (Atom)